How to Create Elegant Dinner Party Menus

Hosting an elegant dinner party is an art, and crafting the perfect menu is a key element in creating an unforgettable experience for your guests. Whether you’re a seasoned entertainer or a novice host, designing a menu that impresses and delights is within your reach. Here’s a step-guide to help you curate a sophisticated dining experience.

Start with a Theme: Begin by choosing a theme for your dinner party. This could be as simple as a specific cuisine, such as Italian or French, or it can be more elaborate, like a ‘Taste of the Mediterranean’ or a ‘Springtime Soiree’. Themes provide a creative direction and make planning the menu more focused. For instance, if you opt for a French-themed dinner, you might include classic dishes like coq au vin and crème brûlée.


Consider Your Guests: Take into account the preferences and dietary requirements of your guests. Do you have any vegetarians or vegans attending? Are there any food allergies you need to accommodate? This step is crucial to ensuring that everyone can enjoy the meal. For example, you might want to offer a vegetarian lasagna alongside a traditional meat-based dish to cater to diverse dietary preferences.

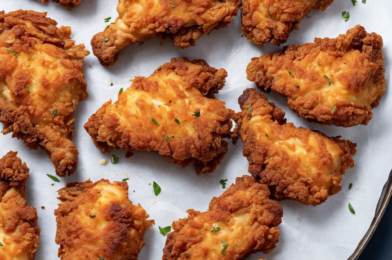
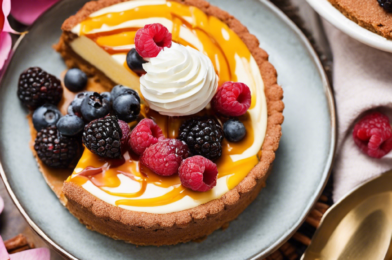
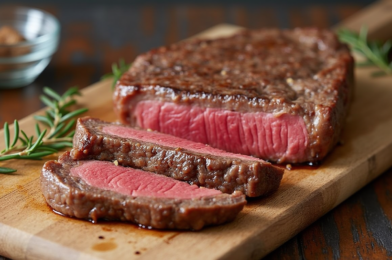
Balance the Courses: A well-structured menu consists of a harmonious balance of flavors, textures, and colors. Start with an appetizer that piques your guests’ interest, like a refreshing watermelon salad with feta and mint. Follow this with a hearty main course, such as roast beef tenderloin with a rich red wine sauce. Then, provide a palate cleanser, perhaps a sorbet, before finishing with a decadent dessert, such as a chocolate mousse cake.

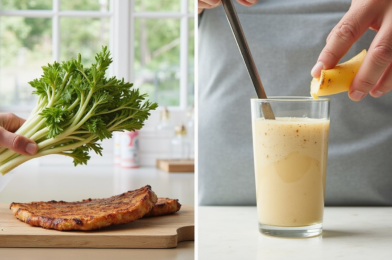
Pair with Drinks: Enhance your menu by thoughtfully pairing each course with drinks. Welcome your guests with a signature cocktail or offer a selection of wines that complement your chosen dishes. For instance, a crisp Pinot Grigio pairs beautifully with fish and seafood, while a full-bodied Merlot is ideal for rich, meaty dishes.

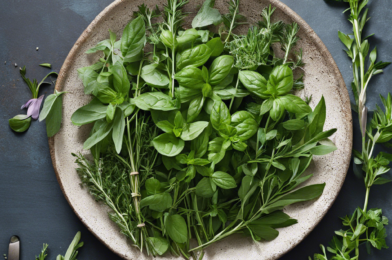
Garnish and Presentation: The visual appeal of your dishes is as important as their taste. Garnishing and creative presentation can elevate even the simplest of menus. Consider garnishes like fresh herbs, edible flowers, or citrus twists to add color and flavor to your plates.

Creating elegant dinner party menus is a creative process that allows you to express your hospitality and love for food. By following these steps and adding your personal touch, you’ll craft a memorable dining experience that will leave a lasting impression on your guests. Happy cooking and entertaining!

How to Use Fresh Herbs to Transform Dishes

Fresh herbs have an incredible power to elevate everyday dishes, adding not just flavor but also a touch of elegance and a burst of color. Cooking with herbs is an art that can transform the ordinary into the extraordinary, taking your culinary creations to a whole new level. Whether you’re a seasoned chef or a home cook, understanding how to use fresh herbs effectively is key to crafting memorable meals. So, let’s embark on a journey to discover the magic of herbs and learn how to use them to their full potential.

The beauty of fresh herbs lies in their versatility. From aromatic basil to savory thyme, each herb brings its unique flavor profile to the table. Basil, for instance, is a summer favorite, perfect for enhancing tomato-based dishes and crafting mouthwatering pesto. Its sweet, slightly peppery flavor makes it a perfect match for pasta, salads, and pizza. On the other hand, thyme, with its earthy, slightly minty notes, is a master at infusing depth into soups, stews, and roasted meats. Imagine a hearty chicken casserole or a classic beef stew without the subtle yet compelling presence of thyme – it simply wouldn’t be the same!

The trick to unleashing the full potential of herbs lies in knowing when and how to add them. Herbs can be used in various forms: finely chopped, whole, or even as a vibrant garnish. For delicate herbs like basil and cilantro, adding them towards the end of cooking or using them as a finishing touch ensures their flavors and textures remain intact. This way, they provide a burst of freshness that tantalizes the taste buds. In contrast, hardier herbs like rosemary and oregano can withstand longer cooking times, making them ideal for slow-cooked dishes and marinades.

When using fresh herbs, a little goes a long way. A few sprigs of rosemary can infuse a whole pot of soup with its robust flavor, while a handful of chopped parsley can transform a simple dish of rice or quinoa into a feast for the senses. The key is to experiment and find the right balance for your palate. Start with a small amount and gradually increase, adjusting as you go.

Incorporating fresh herbs into your cooking is also a great way to add variety and nutritional value to your diet. Many herbs are rich in antioxidants, vitamins, and minerals, making them a healthy and flavorful addition to any meal. Basil, for example, boasts anti-inflammatory properties, while parsley is high in vitamins A, C, and K. So not only are you enhancing the taste of your dishes, but you’re also contributing to your overall health and well-being.

To ensure you always have a supply of fresh herbs on hand, consider growing your own herb garden. It can be a small collection of potted herbs in your kitchen or a larger outdoor garden. The joy of plucking fresh herbs from your own garden just before cooking is incomparable. Plus, it’s cost-effective and guarantees the freshest possible ingredients for your culinary creations.

In conclusion, fresh herbs are a chef’s secret weapon for crafting exceptional dishes. They add depth, complexity, and visual appeal to your cooking, taking it from good to great. Whether you’re a culinary novice or a seasoned expert, embracing the art of herb cookery will undoubtedly bring a new level of enjoyment and flavor to your kitchen adventures. So, experiment, explore, and let the magic of fresh herbs transform your everyday meals into something truly special. Happy cooking!

Master the Art of Sous Vide Cooking

Unlocking the Secrets of Sous Vide Cooking: A Beginner’s Guide

The world of culinary arts is ever-evolving, and one technique that has gained immense popularity among chefs and home cooks alike is sous vide cooking. This innovative method promises precise control over cooking temperatures, resulting in mouthwatering dishes with unparalleled texture and flavor. But what exactly is sous vide, and how can you master this art in your kitchen? Let’s dive right in!

Sous vide, which translates to “under vacuum” in French, involves cooking food sealed in airtight bags in a water bath at precise temperatures. This method ensures that every part of your steak, chicken, or vegetable is cooked to perfection, eliminating the fear of overcooking. The secret lies in the consistent temperature maintained throughout the cooking process, resulting in exceptionally tender meats and perfectly cooked vegetables.

To begin your sous vide journey, you’ll need a few essential tools. A sous vide immersion circulator is a must-have, as it accurately controls the water temperature and circulates it to ensure even cooking. These devices are now widely available and come with user-friendly interfaces, making them accessible to beginners. Additionally, you’ll require sturdy plastic bags designed for sous vide cooking, ensuring that your food remains secure during the process.

The beauty of sous vide cooking lies in its simplicity. First, prepare your food by seasoning it or adding any desired marinades. Then, seal the food in the sous vide bags, ensuring no air is trapped inside. Set your immersion circulator to the desired temperature based on the type of food you’re cooking, and let the machine do its magic. Cooking times vary, so refer to reliable recipes to achieve the best results.

One of the benefits of sous vide is its hands-off nature. Once you’ve set the right temperature and submerged the food, you can attend to other tasks while your meal cooks to perfection. Say goodbye to constant monitoring and worrying about burning your dishes!

When your food is ready, finish it off with a quick sear in a hot pan or a blast under the broiler. This step adds a delightful crispness and color to your dish without compromising the delicate flavors achieved through sous vide cooking.

Sous vide cooking opens up a world of possibilities for creating restaurant-quality meals at home. From juicy steaks to tender vegetables, this technique guarantees consistently delicious results. Experiment with different recipes and cooking times to discover the full potential of this fascinating culinary art.

So, embrace the sous vide revolution and impress your family and friends with your newfound cooking skills. Happy sous vide adventures!

The Science of Baking: Tips for Success

Baking is an art, but it’s also a precise science. Achieving the perfect cake, bread, or pastry isn’t just about following a recipe; it involves understanding the chemistry behind the ingredients. With a few simple tips and insights into the science of baking, you can transform your kitchen into a gourmet bakery.

Firstly, let’s talk about flour, the backbone of most baked goods. Different types of flour have varying protein contents, which directly impact the gluten development in your bakes. All-purpose flour is a versatile choice for beginners, as it contains a moderate amount of protein, creating a balance between tenderness and structure. If you’re aiming for a lighter and softer texture, cake flour, with its lower protein content, is the way to go. Conversely, bread flour, with its higher protein level, is ideal for chewier and more robust bakes. Understanding these nuances will help you select the right flour for your desired outcome.

The role of leavening agents is another crucial aspect of baking science. Baking powder and baking soda are commonly used to make your baked goods rise by releasing carbon dioxide gas during baking. Baking soda is an alkaline ingredient, and when combined with an acid, such as buttermilk or lemon juice, it creates carbon dioxide bubbles that lift the batter or dough. Baking powder, on the other hand, is a blend of baking soda and an acid, and it can work alone to create the desired leavening effect. Accurate measurement and proper mixing of these agents are essential to ensure a consistent rise.

Temperature is a critical factor in baking, as it affects the transformation of ingredients. Precise oven temperature control is vital to achieve the desired outcome. For example, a cake may bake too quickly at higher temperatures, resulting in a burnt exterior and an undercooked center. On the other hand, a lower temperature might require an extended baking time, potentially drying out your baked goods. Always preheat your oven and use an oven thermometer to ensure accuracy.

Moisture content also plays a significant role in the science of baking. The interaction of moisture with other ingredients can impact texture and flavor. For instance, using butter at room temperature allows it to cream properly with sugar, trapping air bubbles that contribute to the rise of your cake. Overmixing can cause gluten overdevelopment, resulting in a tough texture. Understanding when to mix thoroughly and when to mix gently is key to achieving the right consistency.

In the world of baking, precision and an understanding of the science behind the process can elevate your creations from good to exceptional. So, the next time you step into your kitchen, remember these tips and let the science of baking work its magic! Happy baking!

How to Make Perfectly Crispy Fried Chicken

Crispy, golden fried chicken is the ultimate comfort food and a beloved classic. Achieving that perfect crispiness on the outside while keeping the meat juicy and tender on the inside is an art worth mastering. Whether you’re a fried chicken enthusiast or simply looking to impress your family and friends, this guide will take you through the process step by step. Get ready to indulge in mouthwatering, perfectly crispy fried chicken that will have everyone asking for your secret!

The secret to achieving that coveted crispy texture lies in a few key steps and ingredients. First, ensure you start with fresh, good-quality chicken. Bone-in, skin-on chicken pieces are ideal, as the bone adds extra flavor and moisture. Chicken breasts, thighs, or drumsticks—the choice is yours! Next, prepare a wet batter and a dry coating. The wet batter is usually a mixture of buttermilk and a variety of spices, while the dry coating consists of flour, cornstarch, and additional seasonings. This two-step process ensures a robust, flavorful exterior.

Before you begin the frying process, allow the chicken pieces to marinate in the buttermilk mixture for at least 30 minutes or up to overnight. This step is crucial, as it helps to tenderize the chicken and infuse it with flavor. Once marinated, it’s time to coat the chicken. Start by dredging each piece in the flour mixture, ensuring an even and thorough coating. Then, dip it back into the buttermilk and repeat the process, creating a double layer of protection for the chicken. This double-dredging technique is the key to achieving a thick, crispy crust.

Heat a generous amount of vegetable or canola oil in a deep skillet or fryer to the right temperature, typically around 350°F (180°C). Carefully lower the coated chicken pieces into the hot oil, being mindful of any splatters. Fry the chicken in batches to maintain a consistent temperature and to avoid overcrowding. Cook until the chicken is golden brown and crispy, usually about 10-12 minutes, depending on the size of the pieces.

As you remove the fried chicken from the oil, place it on a wire rack or a plate lined with paper towels to allow any excess oil to drain. This step is essential for achieving that crispy texture and ensuring the chicken stays crispy even as it cools. Serve the chicken hot, and enjoy the satisfying crunch with every bite!

10 Professional Techniques Every Home Cook Should Know

Whether you’re an aspiring chef or a home cook looking to elevate your culinary skills, mastering these 10 professional techniques will transform your cooking game. These methods are the secrets behind creating restaurant-quality dishes in your own kitchen. Let’s dive into the techniques that will make you a culinary master!

1. Mise en Place: Translating to “everything in its place,” this French term is the foundation of efficiency in the kitchen. Before you start cooking, gather and prepare all your ingredients. Chop, measure, and arrange them on your countertop. This preparation ensures a seamless cooking process and prevents the stress of rushing to chop onions while your garlic burns!

2. Mastering Knife Skills: Invest in a good set of knives and learn proper handling techniques. Different knife cuts serve various purposes. For example, julienne or matchstick cuts are perfect for stir-fries, while dicing creates evenly-sized pieces for consistent cooking. Sharp knives also make your prep work safer and more enjoyable.

3. Sautéing: This quick, high-heat cooking method is perfect for sealing in the flavors and juices of your ingredients. Use a thin layer of oil, preheat your pan, and ensure your ingredients are dry to achieve a perfect sear. This technique is ideal for cooking vegetables, meats, and creating flavorful bases for sauces.

4. Roasting: A versatile technique, roasting brings out the best in various ingredients, from vegetables to meats. Preheat your oven to a high temperature, ensuring a nice browning on the outside while keeping the inside moist and tender. Roasting brings a depth of flavor and texture that is hard to beat.

5. Braising: Ideal for tougher cuts of meat, braising involves slow-cooking in a flavorful liquid. This technique transforms connective tissues into gelatin, resulting in melt-in-your-mouth tenderness. It’s a great way to turn affordable cuts into delicious, hearty meals.

6. Emulsifying: Creating a smooth blend of ingredients that don’t typically mix, like oil and vinegar, is an art. The key to a perfect emulsion is to slowly add the oil to the vinegar while continuously whisking, creating a stable, creamy mixture. This technique is essential for making vinaigrettes, mayonnaise, and hollandaise sauce.

7. Reducing Sauces: Intensify the flavors of your sauces by boiling them down. This process thickens the sauce, enhancing both flavor and texture. Reducing is perfect for creating rich, savory sauces that elevate any dish.

8. Seasoning to Taste: A well-seasoned dish is a delicious dish. Learn to balance salt, pepper, and other seasonings to enhance natural flavors without overpowering them. Taste as you cook and adjust seasonings accordingly.

9. Using Herbs and Spices: Fresh herbs and spices add depth and complexity to your dishes. Experiment with different combinations to create unique flavors. From a simple garnish to an integral part of the dish, herbs and spices are essential for culinary creativity.

10. Plating: Presentation is key! Arrange your dish on the plate with care, ensuring a visually appealing result. A well-plated meal not only tastes better but also showcases your culinary skills.

Embrace these techniques, and you’ll soon be cooking with the expertise of a professional chef. Happy cooking, and enjoy the delicious journey ahead!

How to Create Gourmet Desserts at Home

Elevate Your Dessert Game: Mastering Gourmet Treats in Your Home Kitchen

Creating gourmet desserts at home is an art that can delight your taste buds and impress your guests. With a few simple techniques and a dash of creativity, you can transform ordinary ingredients into extraordinary culinary delights. Get ready to explore the world of exquisite desserts that will make your everyday treats truly memorable!

Mastering the Basics:
Every culinary adventure begins with mastering the essentials. When it comes to dessert-making, some fundamental skills are your building blocks. Start by familiarizing yourself with different baking methods such as baking, roasting, and steaming. Practice precision in measuring ingredients to ensure your recipes turn out flawlessly. Learn how to create basic doughs and batters, such as pastry dough, cake batter, and meringue. These skills will become your secret weapons in crafting delectable desserts.

Choosing Quality Ingredients:
The key to gourmet-style desserts lies in the ingredients you use. Opt for high-quality, fresh produce whenever possible. For example, select ripe, juicy fruits for tarts and fresh berries for compotes. Invest in premium chocolate with a high cocoa content for rich, decadent truffles or mousses. When it comes to dairy, use real butter and full-fat cream for maximum flavor and texture. These small details make a big difference in the overall quality of your desserts.

Experiment with Unique Flavor Combinations:
Gourmet desserts often surprise and delight with unexpected flavor pairings. Be adventurous and experiment with unique combinations. Perhaps try infusing your cream with lavender or thyme for a subtle herbal note in your panna cotta. Or add a pinch of chili flakes to your chocolate mousse for a hint of spice. The possibilities are endless, and you can create truly memorable desserts by pushing the boundaries of traditional flavor combinations.

Presentation is Key:
Gourmet desserts are not just about taste; presentation is equally important. Pay attention to the visual appeal of your creations. Invest in some basic decorating tools like piping bags, spatulas, and offset spatulas. Practice your frosting skills and experiment with different techniques like drizzling, layering, and creating intricate patterns. Remember, a beautifully presented dessert will not only taste amazing but will also leave a lasting impression.

Creating gourmet desserts at home is an enjoyable and rewarding experience. With practice and a little creativity, you’ll soon be crafting desserts that rival those in high-end restaurants. So, gather your ingredients, whip out your mixing bowls, and embark on this delicious journey to gourmet dessert excellence!

Tips for Making Homemade Sushi Like a Chef

Welcome to the world of sushi-making, where you can unleash your inner chef and create delicious, restaurant-quality sushi right in the comfort of your home. Making homemade sushi is an art, and with these tips, you’ll be rolling with confidence like a seasoned sushi master. Get ready to impress your taste buds and your guests with mouth-watering sushi creations!

Choose Your Ingredients Wisely:
The key to exceptional sushi lies in the quality of its ingredients. Select the freshest fish available, preferably sushi-grade. Salmon, tuna, and shrimp are popular choices, but don’t be afraid to experiment with other varieties. Opt for short-grain Japanese rice, often labeled as ‘sushi rice,’ and ensure it’s rinsed thoroughly before cooking. Invest in high-quality rice vinegar, as it plays a crucial role in flavoring the rice. Fresh vegetables like avocado, cucumber, and carrots not only add color but also provide crunch and texture.

Master the Art of Rice Cooking:
The foundation of great sushi is perfectly cooked rice. Cook the rice following the package instructions, paying close attention to the water-to-rice ratio. Once cooked, transfer the rice to a large bowl. Prepare the rice seasoning by mixing rice vinegar, sugar, and salt in a separate bowl until the sugar dissolves. Gently fold the seasoned vinegar into the rice while fanning it with a fan or a piece of cardboard to cool it down and give it a glossy finish.

Prepare Your Sushi Station:
Set up a clean and organized workspace. Have your ingredients ready: the prepared rice, fish (sliced into thin pieces), vegetables (cut into thin sticks), and nori (seaweed sheets). Keep a small bowl of water nearby to dip your hands in, as this will prevent the rice from sticking to your hands while rolling.

Rolling Techniques:
Time to roll! Place a sheet of nori on a bamboo sushi mat, leaving about a quarter of the nori exposed. Spread a thin layer of seasoned rice over the nori, leaving a 1-inch border at the top. Arrange your fillings horizontally across the center. With the help of the mat, start rolling from the bottom, applying gentle pressure to form a tight cylinder. Repeat until you’ve made several rolls.

Stay tuned for more tips on cutting and presenting your homemade sushi like a pro!

How to Cook the Perfect Medium-Rare Steak

Cooking the perfect medium-rare steak is an art that many home cooks aspire to master. Achieving that mouthwatering, juicy steak with a beautiful pink center and a perfectly seared crust is a delightful culinary experience. Whether you’re a steak enthusiast or a novice in the kitchen, here’s a comprehensive guide to help you nail the perfect medium-rare steak every time.

The secret to a mouthwatering steak lies in the quality of the meat. Opt for a well-marbled cut like a ribeye or striploin for the best flavor and texture. Look for a bright red color with fine white fat distribution, ensuring the steak is fresh and prime for cooking. Aging the beef can enhance its flavor and tenderness, so consider choosing dry-aged cuts for an extra special treat.

Bringing your steak to room temperature before cooking is crucial. Take it out of the refrigerator 30-60 minutes before cooking, depending on its thickness. This step ensures even cooking and helps the steak cook more precisely to your desired doneness.

Seasoning is key to enhancing the steak’s natural flavors. Keep it simple with a generous sprinkle of salt and coarsely ground black pepper on both sides. Some chefs also add a bit of garlic powder or dried herbs like rosemary or thyme for an extra flavor boost.

Preheat your pan or grill to high heat. For a truly seared steak, ensure your cooking surface is hot enough to hear that satisfying sizzle when the steak hits the pan or grill. A cast-iron skillet is an excellent choice for achieving a deep, flavorful crust.

Sear the steak for 2-3 minutes on each side for medium-rare, depending on its thickness. Use tongs to flip the steak, ensuring you only do so once to maintain a consistent internal temperature. For a thicker steak, consider finishing it in the oven for a few minutes to ensure it cooks evenly throughout.

Let the steak rest for 5-10 minutes before slicing. This resting period allows the juices to redistribute, ensuring a tender and juicy bite. Slicing against the grain will also make the steak more tender and easier to chew.

The perfect medium-rare steak should have a warm red center with a hint of pink and an internal temperature of 130-135°F. If you’re unsure, use a meat thermometer to check the temperature, ensuring your steak is cooked just right.

Serve your steak with complementary sides such as roasted vegetables, mashed potatoes, or a fresh green salad. Add a pat of herbed butter or a drizzle of your favorite sauce, and enjoy the melt-in-your-mouth experience of a perfectly cooked medium-rare steak.

Mastering the art of cooking steak to medium-rare perfection is a skill that will delight your taste buds and impress your dinner guests. With high-quality ingredients, proper seasoning, and attention to cooking techniques, you’ll soon become a steak connoisseur in your own kitchen. So fire up that grill or skillet and enjoy the sizzle of success!

The Art of Plating: Make Your Meals Instagram-Worthy

Make your meals a feast not only for the taste buds but also for the eyes! The art of plating is a culinary skill that can transform your home-cooked dishes into Instagram-worthy masterpieces. With a few simple techniques and a dash of creativity, you can elevate your dining experience and impress your friends and followers. Get ready to unleash your inner artist in the kitchen!

Plating, often considered the final touch to a chef’s masterpiece, is the process of arranging food on a plate to create a visually appealing presentation. It’s like painting with food, where the ingredients become your palette of colors and textures. The goal is to make your dish look irresistible, enticing people to grab their forks and indulge.

To begin, consider the color palette of your dish. A vibrant mix of hues can make your meal pop. Think about combining colorful vegetables like roasted bell peppers, purple carrots, and cherry tomatoes. Add a splash of green with fresh herbs such as basil or microgreens for a natural, rustic charm. Remember, a colorful plate is not only visually appealing but also suggests a nutritious and well-balanced meal.

Next, focus on texture. Contrasting textures not only add visual interest but also enhance the overall dining experience. Include elements that are crispy, creamy, and tender. For instance, a crisp salad with a creamy dressing, served alongside a perfectly seared steak, offers a delightful interplay of sensations.

Arrange your food in a thoughtful manner. Play with heights and shapes to create visual interest. Try stacking ingredients or leaning items against each other for a more dynamic presentation. For instance, leaning a grilled fish against a bed of mashed potatoes can create a visually appealing focal point.

Don’t forget the power of garnishes! A sprig of fresh herb, a drizzle of sauce, or a sprinkle of edible flowers can transform an ordinary dish into something extraordinary. These finishing touches can add flavor, color, and sophistication to your plate.

Lastly, practice makes perfect. Experiment with different plating techniques and find your style. Look for inspiration from cookbooks, culinary magazines, or Instagram food bloggers. But remember, while presentation is important, the taste and quality of your food should always be the top priority.

So, are you ready to turn your kitchen into a culinary studio? With these tips, you’ll be creating Instagram-worthy dishes that will delight both your taste buds and your followers. Happy plating!